Installation of openmediavault – windows based nas tutorial (I)
I. Why choose to build a NAS system based on Windows:
- The home computer needs to be turned on frequently for other purposes. If you buy another NAS host (such as Synology) or build a NAS system with another real machine, you will be wasted and not fully utilized.
- With the daily application, the NAS system built on the Windows system is still more convenient.
- Of course, if you rarely use your computer every day, you can buy a NAS host or a small server to build your own NAS system.
II. Introduction to openmediavault
Openmediavault is a next-generation network attached storage (NAS) solution based on Debian Linux. It includes SSH, (S)FTP, SMB/CIFS, DAAP Media Server, RSync, BitTorrent Client and more. Thanks to the modular design of the frame, it can be enhanced with plugins.
Openmediavault is primarily designed for small offices or home, but is not limited to these situations. It’s an easy-to-use, ready-to-use solution that allows everyone to install and manage network attached storage without deep understanding.
Official website: https://www.openmediavault.org/
III. Preparing to install openmediavault
- Download openmediavault image
- Download and install the VMware virtual machine,
Reference VMware Workstation PRO 15.0 crack version download (with serial number)
IV. VMware Settings
- Open VMware Workstation and select
File -> New VM -> Typical -> Next: - Select
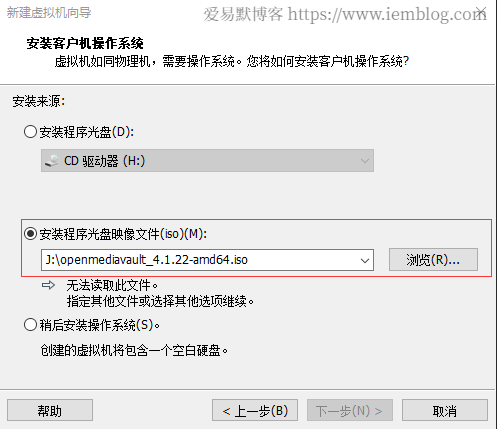
Installer CD Image (iso),Browseand specify the path to the CD image file, then selectNext:

- Select
Linux, then select according to the downloaded version of openmediavault. I downloadopenmediavault_4.1.22-amd64.iso, the version of openmediavault has a corresponding relationship with the Linux kernel, then you can selectDebian 9 .x 64-bitor selectLinux 4.x 64-bitaccording to the Linux kernel

Then clickNext. - Set the name and location of the virtual machine to suit your needs, then select `Next.’
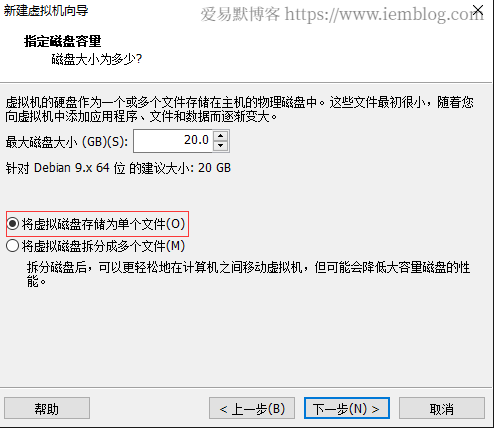
- Disk installation
Default sizecan be set. If it is not enough, you can expand it; then selectSave virtual disk as single file->Next>.
- At this time, you can customize the hardware to allocate the appropriate memory and CPU to the virtual machine according to your computer’s performance and needs. Of course, you can set it at any time in the future, and then click `Finish.’
- The virtual machine will then load the image file and launch the installer.
V. Installing the openmediavault system
- Select
Install

- Choose the right language according to your needs (I choose Chinese here)

- Select
Yes

- Select region
China

- Select keyboard style
Chinese

- Start loading the installation components

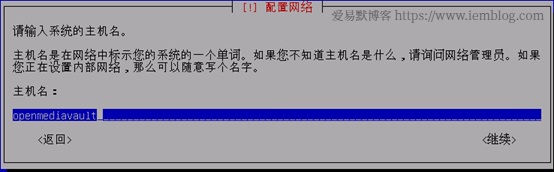
- Set the host name, feel free to fill in
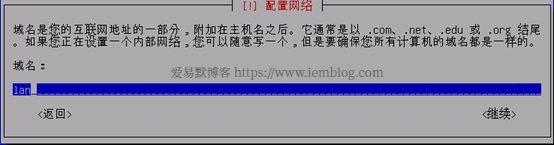
- Set the domain name, feel free to fill in
- Set the root password

- Set time

- Select the disk where the system is to be installed. The disks are arranged in the order of
sda->sdb->sdcaccording to the interface order on the motherboard. Generally, the defaultsdais selected.

- Start installation

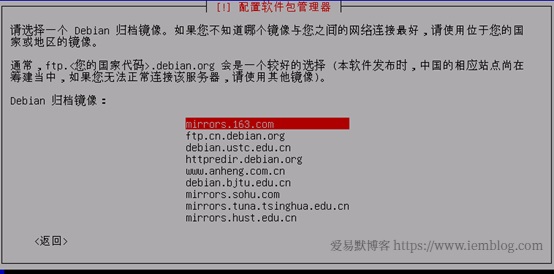
- Set the country where the image is located

- Simply select the default ftp.country code.debian.org (we choose
ftp.cn.debian.orghere)
15.Install the grub boot loader, consistent with the above selection sda

- Installation is complete, click Continue to wait for the virtual machine to restart

- After the installation is complete, we can see the ip address
192.168.1.88accessed through the webpage, followed by the login webpage usernameadminpasswordopenmediavault. If you want to change the web access password, you can access192.168.1.88inBrowserand set the new password in theSystem -> General Settings -> Web Administrator Passwordoption.

Of course, you can also change the password by running theomv-firstaidcommand from the terminal.
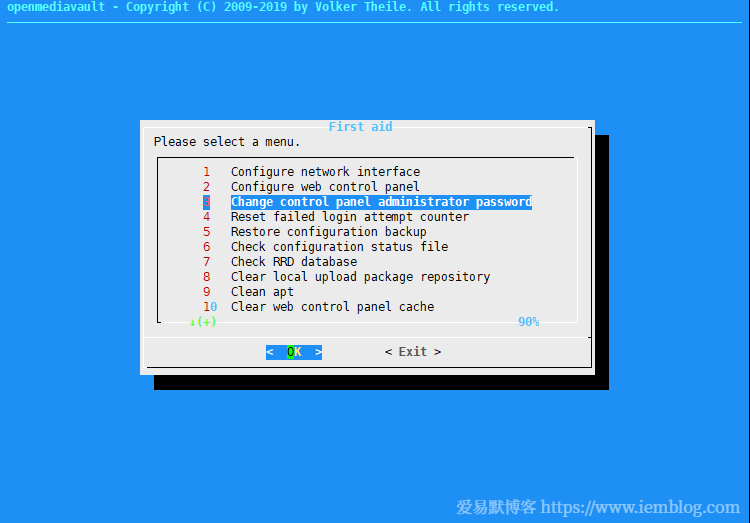
As you can see, this command can also be used to set other features such as network configuration.
VI. Follow-up
We have only completed the construction of the most basic openmediavault-based NAS system. The follow-up tutorial will also introduce the various settings and components of the NAS system.