Although there are many third-party WinPE systems on the Internet, there are more or less various problems: such as useless software bundles; they cannot customize themselves; the system version is too old, etc…
Let’s take a look at how to make a clean WinPE with an interface.
If you want to know more about the original WinPE without interface, you can refer to: https://docs.microsoft.com/zh-cn/windows-hardware/manufacture/desktop/download-winpe–windows-pe
How to customize a pure WinPE with GUI
Download WinPE
- WinPE download based on XP system http://gena.cwcodes.net/Compressed/index.php
- WinPE download based on Win7 system http://w7pese.cwcodes.net/Compressed/index.php
- WinPE download based on Win8 system http://w8pese.cwcodes.net/Compressed/index.php
- WinPE download based on Win8.1 system http://win81se.cwcodes.net/Compressed/index.php
- WinPE download based on Win10 system http://win10se.cwcodes.net/Compressed/index.php
My choice is Win10XPE. The currently supported system version is 1709, 1803, 1809, 1903. After downloading the system image, you need to select one of the 4 to download.

Download Windows System Image
Go to https://tb.rg-adguard.net/public.php and download the system image corresponding to WinPE. I download the latest version of 1903. (till this moment).

Unzip and run WinPE Configurator
- Unzip the downloaded Win10XPE_2019-07-20.7z tarball,
Note:The entire path of the directory where the decompression is located —— cannot containChinese - Unzip or load the downloaded system image file Win10_1903_V1_Chinese(Simplified)_x64.iso to the virtual CD-ROM drive. The same path cannot contain
Chinese. - Click Win10XPE.exe to run the program.
Configuring WinPE
Required settings
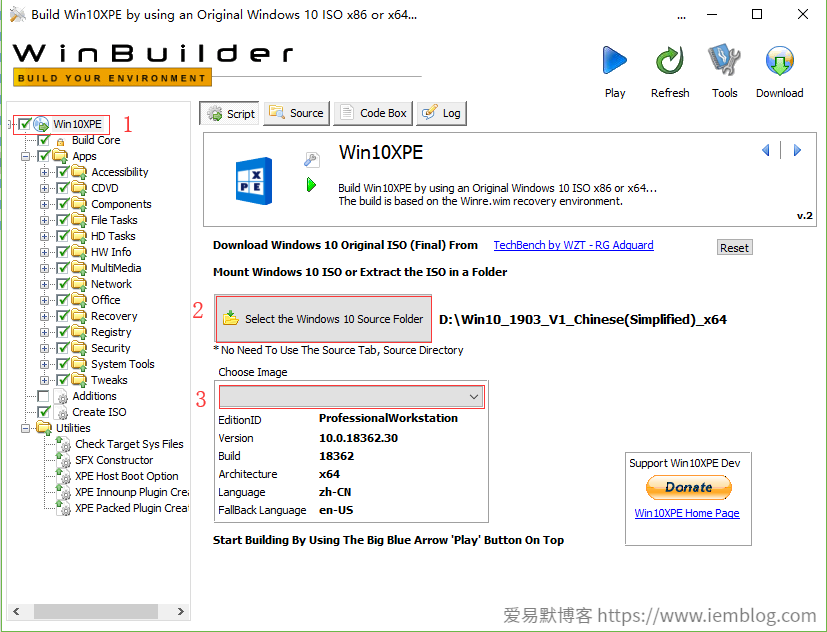
- First click on
WinPEin the tree top left corner (above Figure 1) - Then click
Select the Windows 10 Source Folder(above Figure 2) - Select a system version, Small C selects
Win10 Professional Workstation Edition(above Figure 3)
Configuring the required software
From the left tree directory App, select the software you need to do into WinPE. There are many sub-category categories under the App directory to indicate different categories. Expand to see the included software and choose according to your needs.
Configuring System Core and Custom Software

- Click
Build Corein the tree directory on the left to enter the Build Core configuration page. - You can see that there are many system related configurations, including graphics driver, network card driver, Microsoft .NET, and so on. More need to choose.
1) If you want WinPE to be networked, checkNetwork Dirvers
2) If you have a lot of custom software, checkMicrosoft .NETFx4(because many software requires support for .NET components) - Customize the software. To install the custom software, check the
Add Your Custom Folder, clickOpen Custom Folderto open the custom folder, and put your own extra software into theProgram Filesdirectory in the current directory, as shown below is my custom software.


- Set the custom software to display on the desktop and start menu. Click
Edit Pecmd.inito open the pecmd.ini file with a text editor and add the following code under the _SUB Shortcuts tab (corresponding to your own software and path)
LINK %Desktop%\cmder,%ProgramFiles%\cmder\Cmder.exe
LINK %Desktop%\DiskGenius,%ProgramFiles%\DiskGenius\DiskGen.exe
LINK %Desktop%\Norton Ghost 12,%ProgramFiles%\Norton Ghost 12\Ghost64.exe
LINK %Desktop%\Shadowsocks,%ProgramFiles%\Shadowsocks\Shadowsocks.exe
LINK %Programs%\Tools\cmder,%ProgramFiles%\cmder\Cmder.exe
LINK %Programs%\Tools\DiskGenius,%ProgramFiles%\DiskGenius\DiskGen.exe
LINK %Programs%\Tools\Norton Ghost 12,%ProgramFiles%\Norton Ghost 12\Ghost64.exe
LINK %Programs%\Tools\Shadowsocks,%ProgramFiles%\Shadowsocks\Shadowsocks.exe
Generating WinPE image files
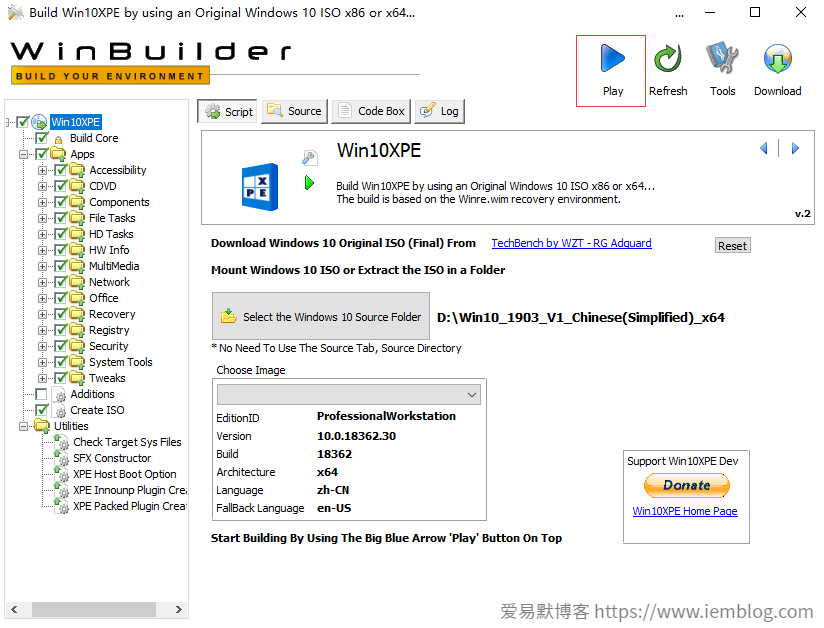
Click Play to generate the WinPE image file we need according to your settings. The generated image file will end up in the Win10XPE root directory with the file name Win10XPE_x64.ISO.
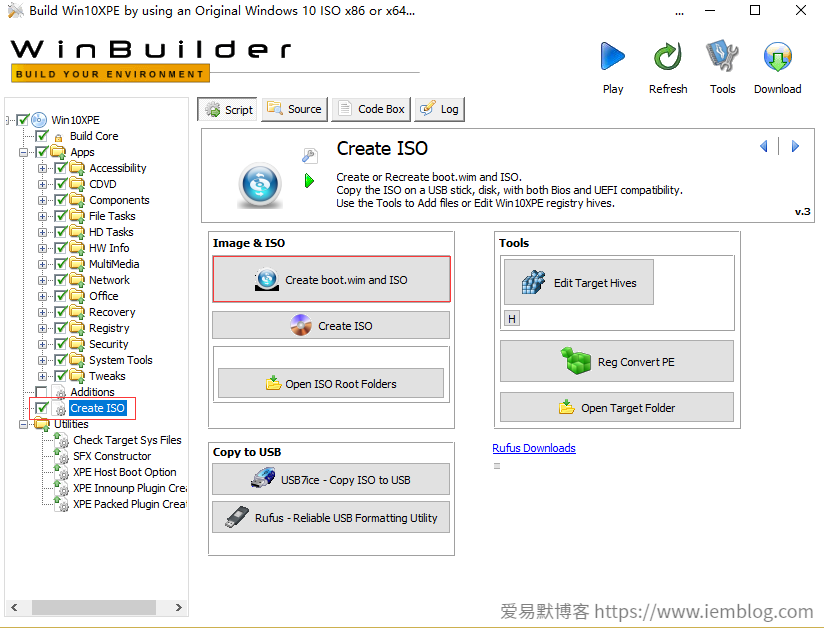
If you have already generated the Win10XPE_x64.ISO image file and need to change the customization software or change other settings, just click Create ISO on the left tree and select Create boot.wim and ISO to regenerate the image file. (Clicking Play will regenerate all, which is equivalent to starting from the beginning, it will take more time)
Making a bootable U disk from an image file
- Download Rufus https://rufus.ie/downloads/
- Run Rufus, select the generated WinPE image file
Win10XPE_x64.ISO, clickStart, wait for the USB disk to be written.